Article

How to Use Room Reservation Software to Schedule Meeting Spaces
TimeTap TeamLet’s face it. Scheduling and organization isn’t for everyone. It’s either a blessing if it’s one of your strengths or it’s a curse that you frequently come up against. When you’re managing a building in which rooms are constantly being rented out for meetings, events or work space, you have to have a solid plan in order.
Here at TimeTap, we believe the usage of room reservation software is (obviously) the way to go. It’s a tricky puzzle to piece together the elements that come with managing facilities, but with the right software, room scheduling can be a helpful service. In this blog, we will walk you through the easy work flow of using the TimeTap scheduling software to facilitate room reservations.
Welcome to Our Scheduler
The first step you will be setting up your Scheduler in the back office of TimeTap’s scheduling software. Within TimeTap’s back office, each tab to the left will be an option of sections to customize for your Scheduler. The sections will be as follow: Rules & Logic (where your greeting will be found), Locations, Staff, Services, Time, Client Info.
The first image of each step is the ‘back office’, aka where you as the building manager will customize each page to fit your reservation requirements. The second image of each step will be the client side. This will be the pages clients will see and interact with during the reservation process. In this work flow, we will focus on setting up ‘Welcome’, ‘Location’, ‘Services’, and ‘Client Info’; as they are the main components in setting up your room reservation scheduler.
Step 1 (Customizing Your Welcome Text)
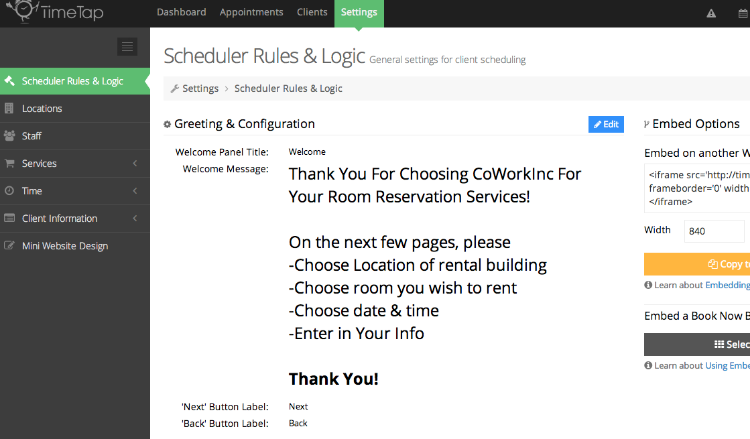
The first page to set up is the ‘Welcome’ page of your scheduler. This is the very first thing your clients will see when reserving rooms. As the building manager, you simply go into the Scheduler Rules and Logic tab and customize the Welcome message with a greeting and directions for the following pages.
Back Office in TimeTap:
Client-Facing side:

Step 2 (Choosing Your Location)
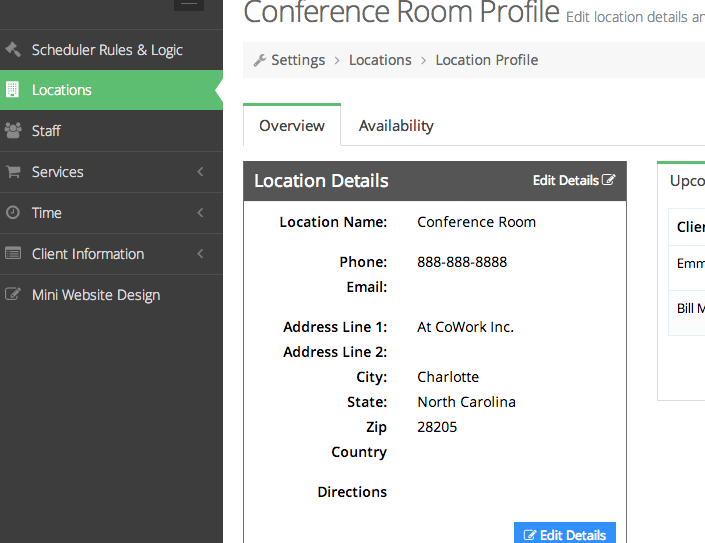
The first part of this step will be to add in the location where the “appointment” is going to be booked. It’s understandable that this phrasing is a bit confusing so let’s walk through the steps together.
You’ll enter in the conference room as the location that’s going to be reserved. By using TimeTap as your facilities management software, as soon as this particular conference room location is reserved by one of your office tenants, no other tenants will be able to reserve the room at the same time.
To set up your ‘Location’ page, you need to click on ‘Edit Details’ and fill in the required fields such as ‘Location Name’, ‘Phone’, ‘Email’, ‘Address’ and any other bit of info that will help clients find your location.
Back Office in TimeTap:
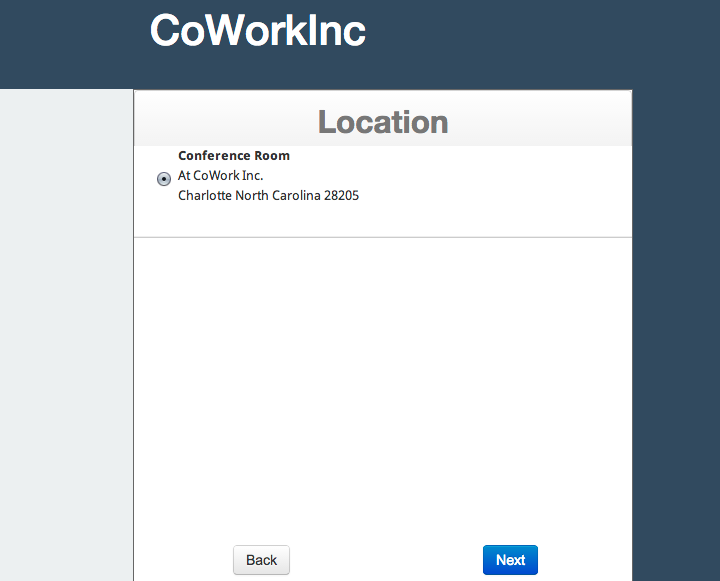
Client-Facing side:
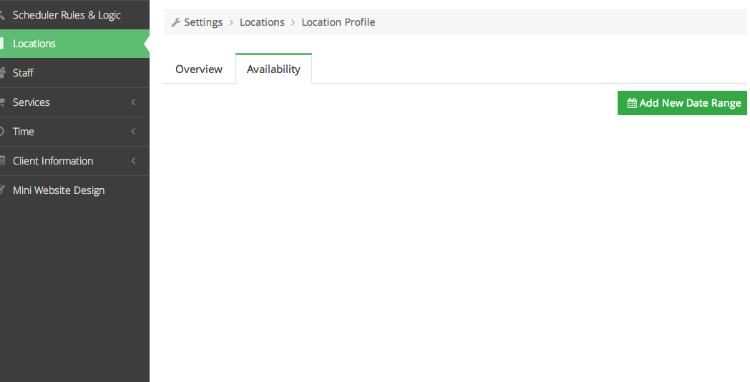
After you’ve entered in the Location info, your next step is customizing the time frames of when the conference room can be reserved. If it can be reserved between 9am-5pm Monday through Friday, for instance, you’ll enter that into the “Availability” tab for the conference room and click on ‘Add New Date Range’:
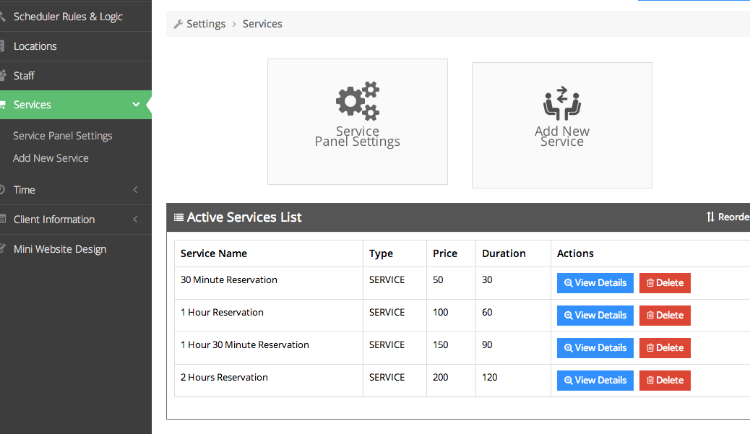
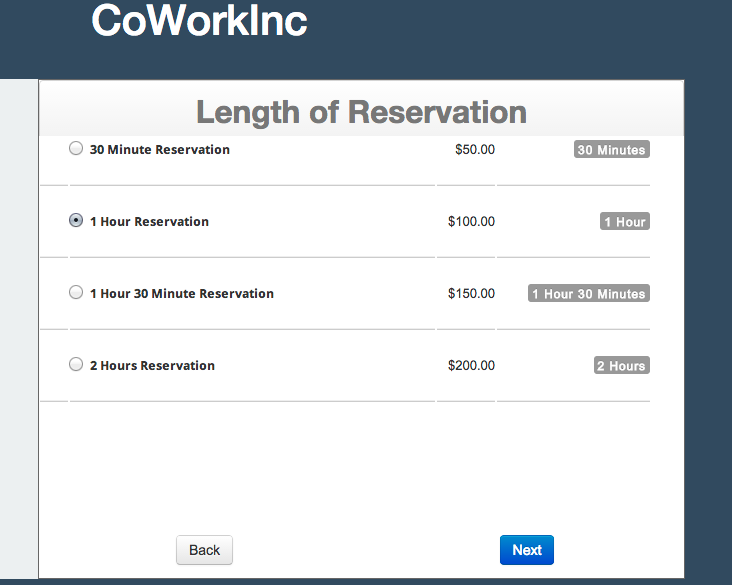
Step 3 (Customize Duration of Reservation)
The next step is to insert in the reservation lengths people can select. To do this you’ll go under Settings > Services. From here, you’ll add a service for each reservation length that tenants could possibly choose. In this demo, I had reservations set for anywhere between 30 minutes - 2 hours.
Back Office in TimeTap:
Client-Facing side:
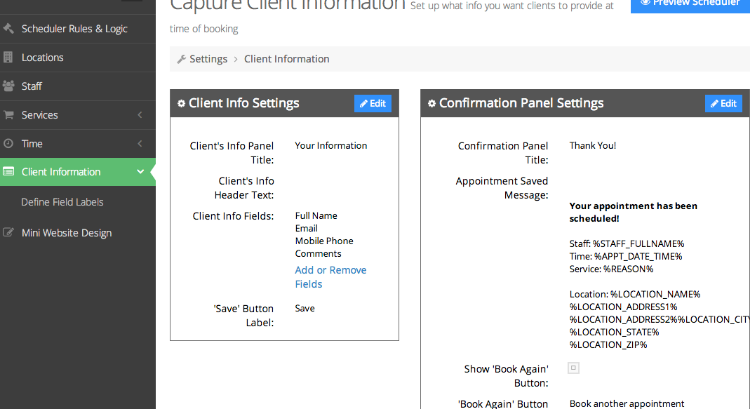
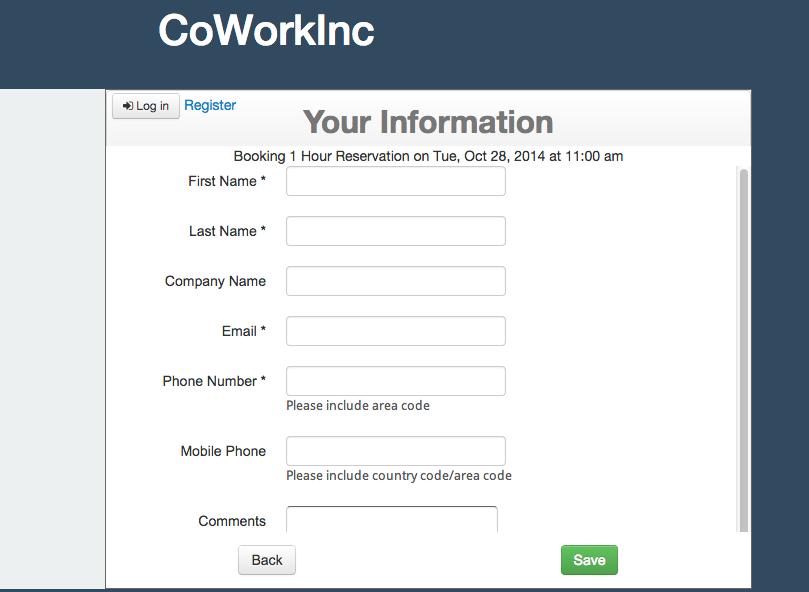
Step 4 (Capturing Client Info)
Now that we have the location, time slots available for renting and your date range availability, you’re ready to book your clients. This last step is where the client will enter in their information into a form. We will display the back office, where you can edit the wording of each data field and also display the client side. After clients fill in the required fields and click ‘Save’, they’re booked!
Back Office in TimeTap:
Client-Facing side:
Want to Know More About our Scheduler?
Scheduling is an art form; at least we like to think so. It takes deliberate planning and a good foundation. We believe that using a scheduling software is the most productive and sensible way to tackle the ‘conference rooms for rent’ conundrum.
If you feel like you need more advice and guidance when it comes to the details of room rentals and reservations, read what we have to say on 4 Quick Tips of Room Reservations. Or if you want to set up a web scheduler of your own, sign up for a free account today.


